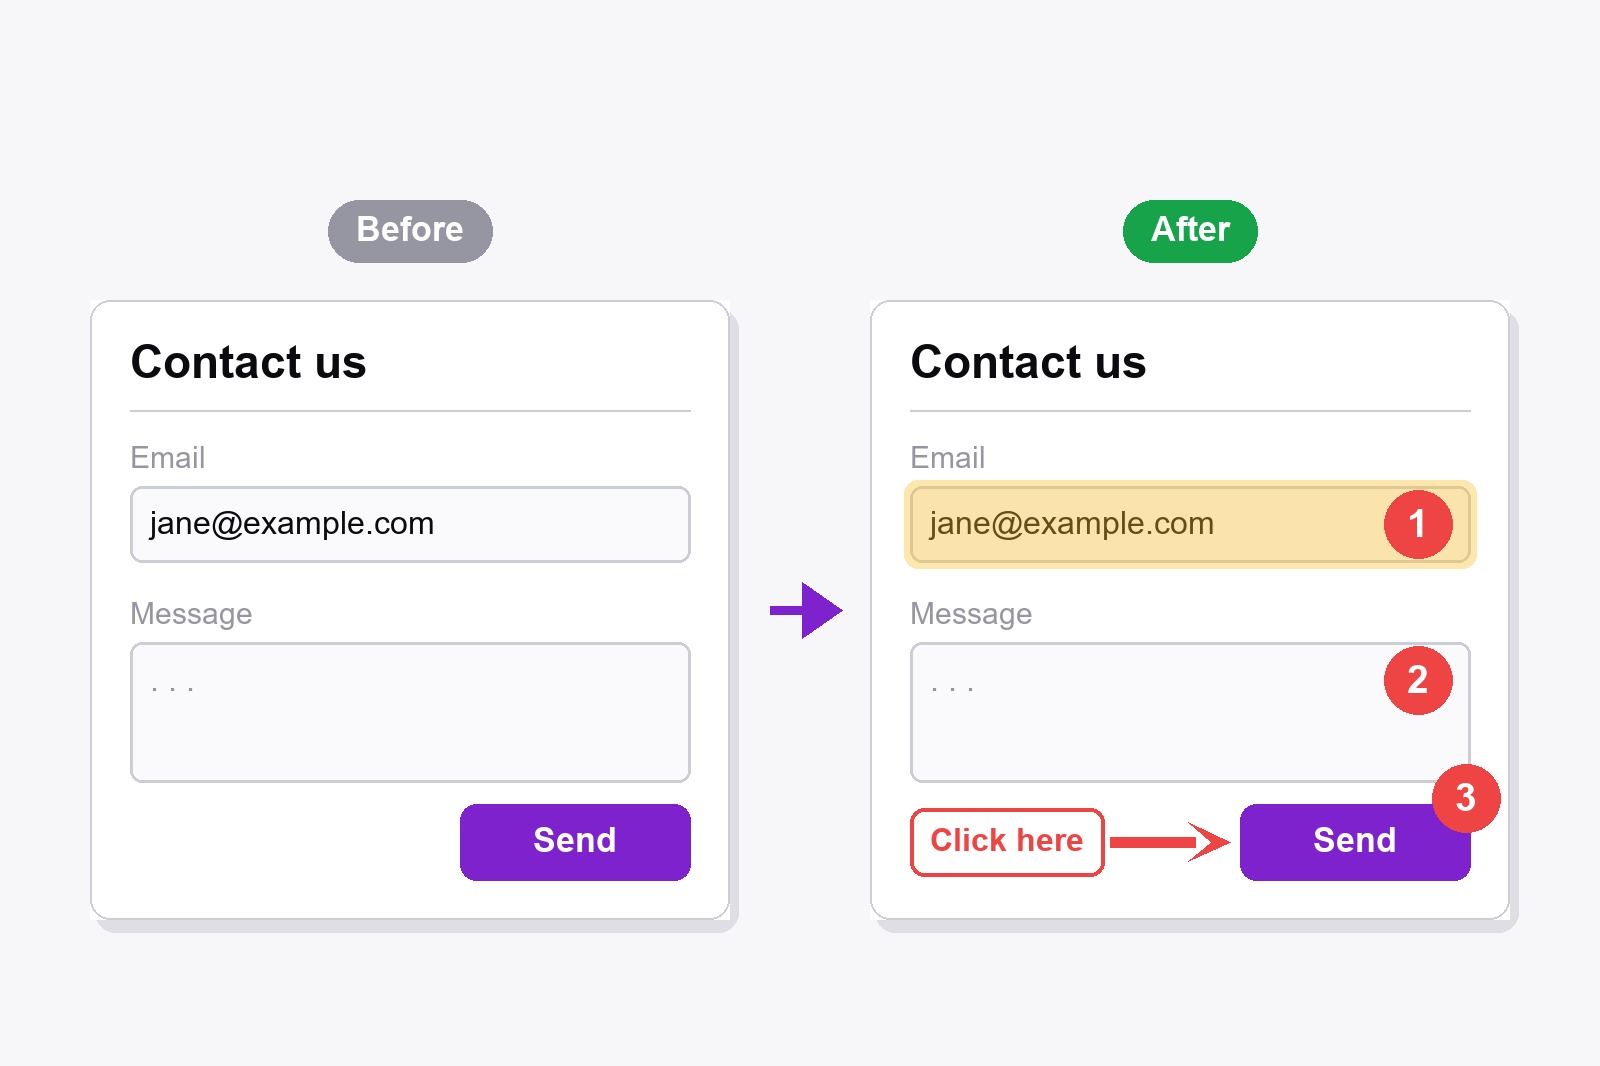
To add arrows and numbered steps to a screenshot in Chrome, capture the page with the free Scrollshot extension, pick the Arrow tool in the editor and drag from where the arrow starts to the thing you want to point at, then pick the Step tool and click where each number belongs. Scrollshot counts 1, 2, 3 for you. Save the image and you are done. It all happens in your browser, nothing is uploaded and you need no account.
Why show it instead of describing it?
Try explaining where the Save button hides in words: “Click the gear, then the second tab, then look under the grey box. No, the other grey box.” Now picture one red arrow pointing straight at it. Your reader decodes nothing, and neither do you at five o’clock when the same question shows up for the fourth time. Arrows say where. Numbers say in what order. Together that is a whole how-to guide, minus the novel.
How to add arrows and numbers to a screenshot, step by step
- Install Scrollshot. Get it from the Chrome Web Store. It is free and needs no account.
- Capture the page. Open the page, click the Scrollshot icon, pick a mode (Full Page, Visible, Region or Element) and click Capture. For a how-to step, Region or Element keeps the picture small and focused.
- Open the editor. Your shot opens in the editor (if it does not, switch on Open editor after capture in the popup settings). Already have an image? Use Upload to open it.
- Pick a colour and a size. Six colours sit under the tools, plus a round button for your own. Red is the default, and it jumps out on almost any page. The Size slider (1 to 20) sets how thick the arrow is and how big the number bubble gets.
- Draw an arrow. Pick the Arrow tool, press where the tail should start and drag to the thing you want to point at. The arrowhead lands where you let go.
- Add the numbers. Pick the Step tool and click where you want number 1. Click again for 2, again for 3. Scrollshot counts for you and picks a white or a black digit so it stays readable on your colour.
- Add a few words if you need them. Pick Text, click on the picture and type. Drag the text to move it, double-click to edit it, pull the corner handle to resize it, press
Deleteto remove it. - Save it. Click Download, or Copy to paste it straight into a chat, a document or a ticket. Oops? Press
Ctrl+Z.
The annotation tools, and when each one earns its place
- Arrow. Your everyday “look here”. Point it at a button, a menu item or a number in a table.
- Step (numbered bubble). The tool that turns a screenshot into a guide. One click per step and the numbers go 1, 2, 3 on their own. After
Ctrl+Zthe next bubble gets the same number again, so you never end up with a missing 4. - Text. For the short label next to an arrow, like “Click here” or “Paste your link”. Choose one of six fonts, make it bold, italic or underlined, and switch on a background (the BG button) when the words sit on a busy picture.
- Highlight. A see-through marker, so the words underneath stay readable. Perfect for one line of text or one row of a table.
- Rectangle and Ellipse. A frame around a whole area. They are outlines by default, and one click on the fill button makes them solid.
- Line and Pen. Line for a straight underline, Pen for anything you would rather scribble by hand.
- Eraser. Rubs out your drawn marks (arrows, shapes, bubbles) and never the screenshot underneath. A text box has its own × button.
A small tip: the Size slider starts at 10. On a big, full-page screenshot a thin arrow disappears, so raise it until the arrow is easy to spot, then lower it again if it covers too much.
Little tricks that make a guide look professional
Use one colour for all arrows and bubbles, so the eye knows they belong together. Number in the order people will really click, left to right and top to bottom. Put a bubble next to the thing, not on top of it, or you hide what you are pointing at. And less is more: three arrows tell a story, twelve tell a mystery.
Where this comes in handy
- Support answers. A screenshot with 1, 2, 3 beats a paragraph that starts with “first, you need to”.
- Bug reports. Point an arrow at the broken thing and the developer finds it in two seconds.
- Step-by-step guides and documentation, where the bubbles match the numbered list under the picture.
- Onboarding a new colleague who just needs to know which button to press first.
- Family tech support. Send grandma a screenshot with a red arrow and skip the phone call.
If the screenshot shows a name, an email or a number you would rather not share, blur it first, then add your arrows. You can mix as many tools as you like in the same picture.
Good to know before you start
- Arrows and numbers go on the screenshot, not on the live page. They are tools in the editor that opens after you capture.
- Numbers count up by themselves. They start at 1 and there is one counter per screenshot. To start again from 1, press Reset, which also removes your other edits.
- All of it is free. Arrows, number bubbles, text and shapes need no upgrade and no account.
- Undo and Redo work. Press Ctrl+Z to step back and Ctrl+Y to step forward, up to 40 steps.
- Nothing is saved until you save it. Download, Copy or Save to History keeps your edited version. History is stored in your browser on this computer.
- It cannot capture Chrome’s own pages or the Chrome Web Store. Try it on any normal website instead.
FAQ
Yes. Capturing, the editor, the arrows, the numbered bubbles, the text and the shapes are all free, with no account.
Open the screenshot in the Scrollshot editor, pick the Step tool and click on the picture where each number should go. The bubbles are numbered 1, 2, 3 automatically.
Yes. Pick one of the six colours (or the round button for your own), then move the Size slider (1 to 20) before you draw. The same colour and size are used for arrows, shapes and number bubbles.
Yes. In the editor click Upload, open the image file, and all the same tools work on it.
Press Reset. It takes the picture back to the original and starts the counter at 1 again. If you only made one mistake, Ctrl+Z is gentler.
Press Ctrl+Z to undo the last mark, or use the Eraser to rub out a particular arrow, shape or bubble. Text boxes have their own delete button.
No. Scrollshot works locally in your browser, so your screenshot never leaves your computer.

Scrollshot — Capture Exactly What You Need
Built by GetPlugzz. Local processing only: nothing uploaded, nothing tracked.